

| User guide | |

To see how layouts work, let's use the most basic layout, a horizontal list (or box). We first create a window:
f = figure();
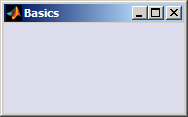
Now let's create the horizontal layout and add it to the figure. Note that in common with other MATLAB graphics objects, one object is added to another by setting the "Parent" property - this will automatically adjust the list of "Children" in the parent object. The job of a horizontal box layout is to arrange its contents in a horizontal line, setting the position of each element to best fill the space:
layout = uiextras.HBox( 'Parent', f );
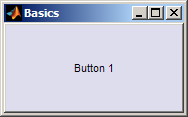
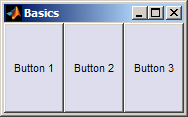
Nothing's changed! That's because the layout is for arranging other user-interface components - it doesn't draw anything itself. Let's add some buttons. Note how after creating each button the existing contents of the box make room for the new addition; we don't need to set the position of any user-interface component!
uicontrol( 'String', 'Button 1', 'Parent', layout );uicontrol( 'String', 'Button 2', 'Parent', layout );uicontrol( 'String', 'Button 3', 'Parent', layout );
 .
. .
.
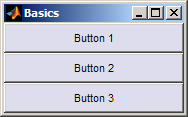
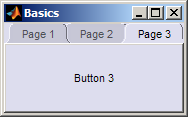
Other layouts work in exactly the same way, although visually the end-result is quite different:
f =figure(); layout =uiextras.VBox( 'Parent', f );uicontrol( 'String', 'Button 1', 'Parent', layout );uicontrol( 'String', 'Button 2', 'Parent', layout );uicontrol( 'String', 'Button 3', 'Parent', layout );
f =figure(); layout =uiextras.TabPanel( 'Parent', f );uicontrol( 'String', 'Button 1', 'Parent', layout );uicontrol( 'String', 'Button 2', 'Parent', layout );uicontrol( 'String', 'Button 3', 'Parent', layout );
 |
Understanding layouts | [Top] | Types of layout |  |